Designing + Making the SÅLLY Adaptable System
So, honestly, I don't know how to write these posts, but I know that I'm proud of some of this work and I want to provide some value through my work. This website, and this post now, is that attempt.
This idea for this project came from my focus on designing inside-out instead of the common outside-in approach to design.
Outside-In Design:
The common way to design anything is to sketch out or model the general form of something. Want a chair? You start with a 4-legged drawing, maybe lean the seat platform back, you figure out the proportions so that the seat height is comfortable and the back of the seat properly supports the seated person. NOW we will start to figure out how to make it. Let's find what kind of material can fit the design, and what kind of machinery we will need to create the forms we put down on paper.

This is the design we are talking about; the Stata Center by Frank Gehry is an example of outside-in design. Started with the form, then adjusted it as the details were worked out. This isn't to say something is better than the other, and nothing is black and white in the design world, but I'm just trying to frame my thinking by using some examples.
Inside-Out Design:
This method of putting things together is to start on the details, and then move out and see what the detail can put together for you. This design process leans on manufacturing methods and therefore ends with a product that is much more adaptable (I'll write more about this idea in another post).
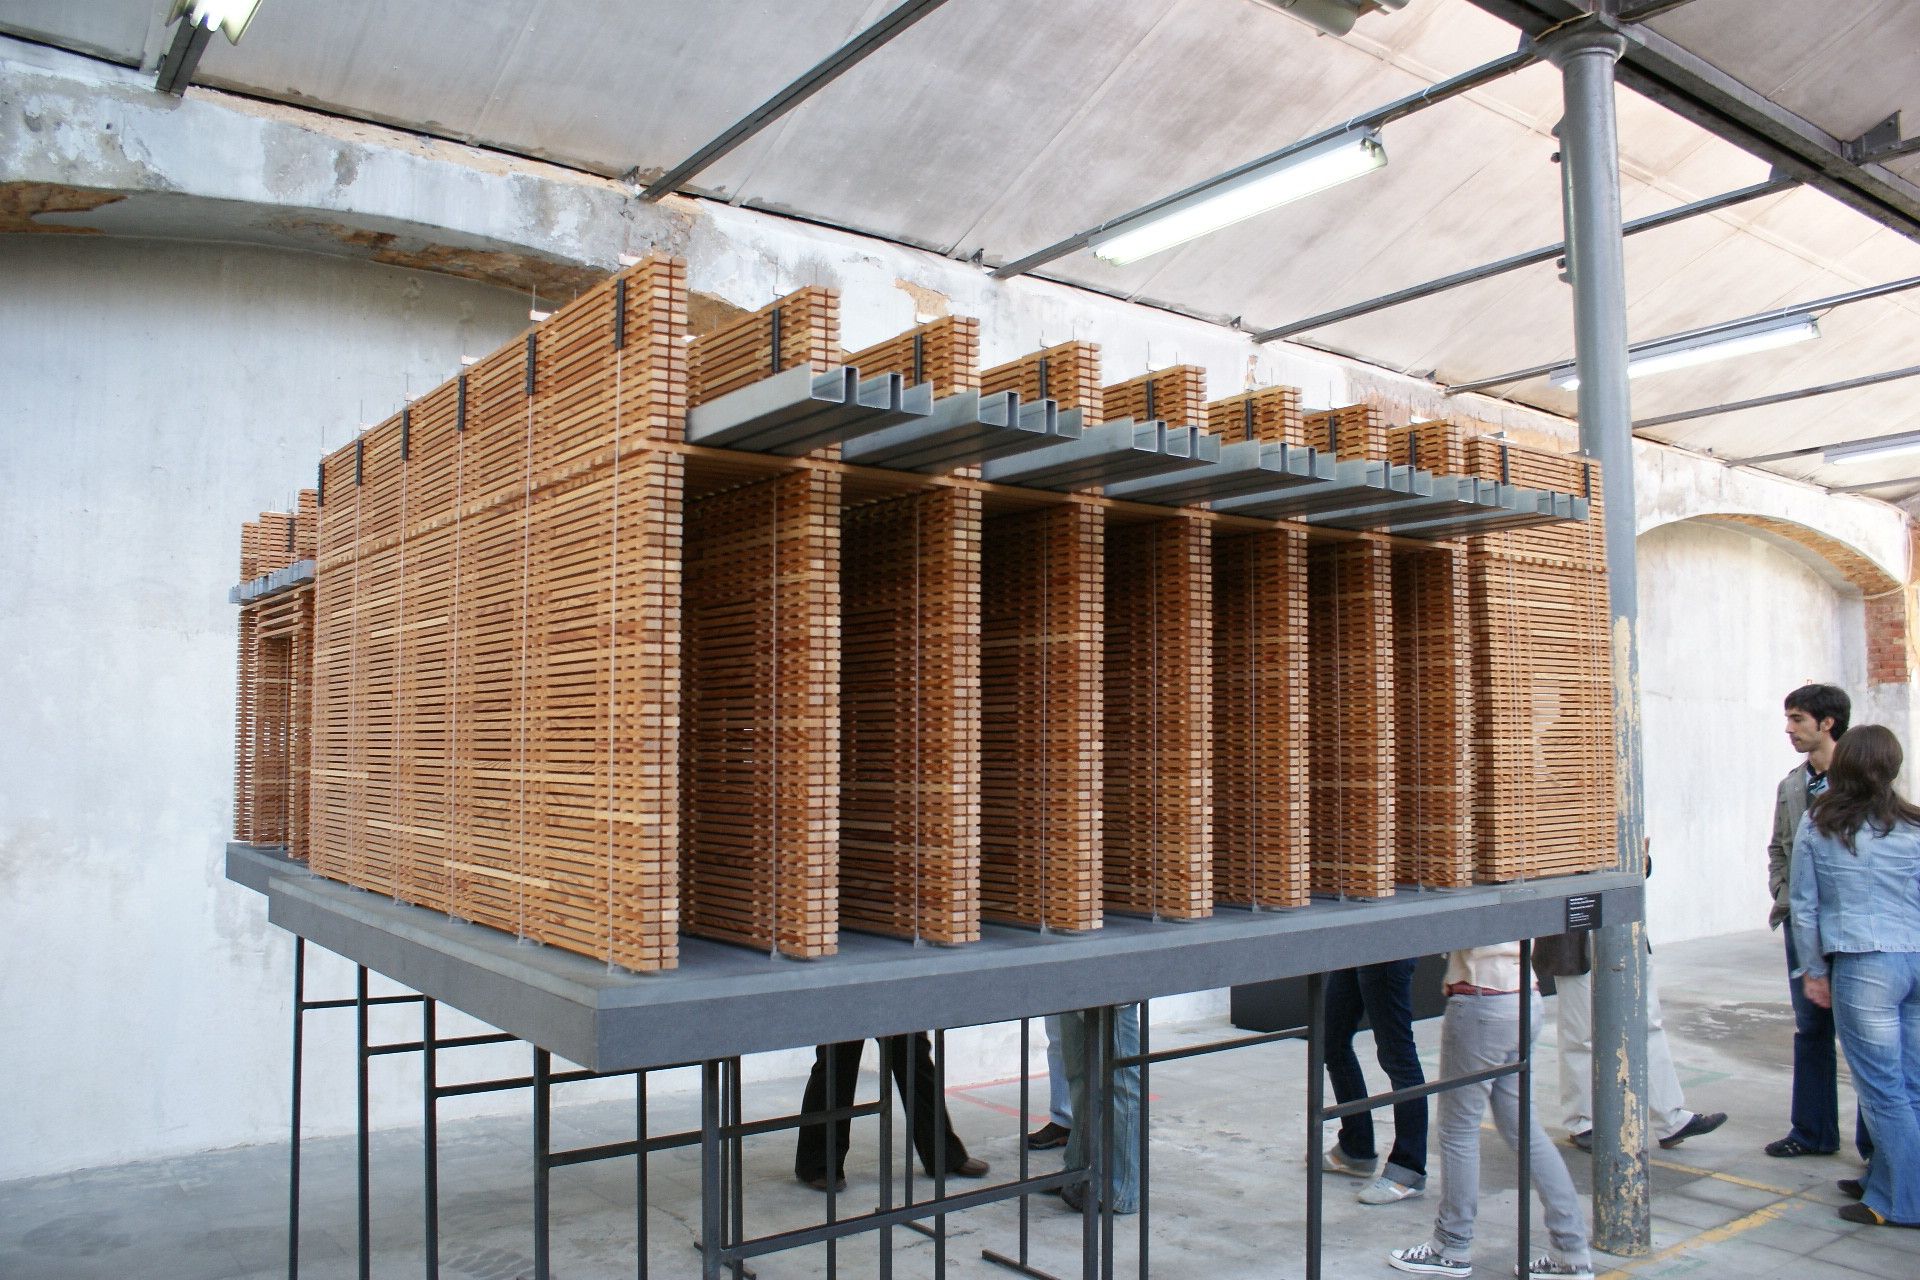
The Swiss Sound Box by Peter Zumthor done for the Swiss Pavilion at the 2000 EXPO is a great example of inside-out design. The structure is basically a stack of lumber held down by tensioned steel cables, creating an incredibly adaptable system. With this exact detail, you can make numerous amount of structures, take them apart, and put them together again (therefore adaptable).
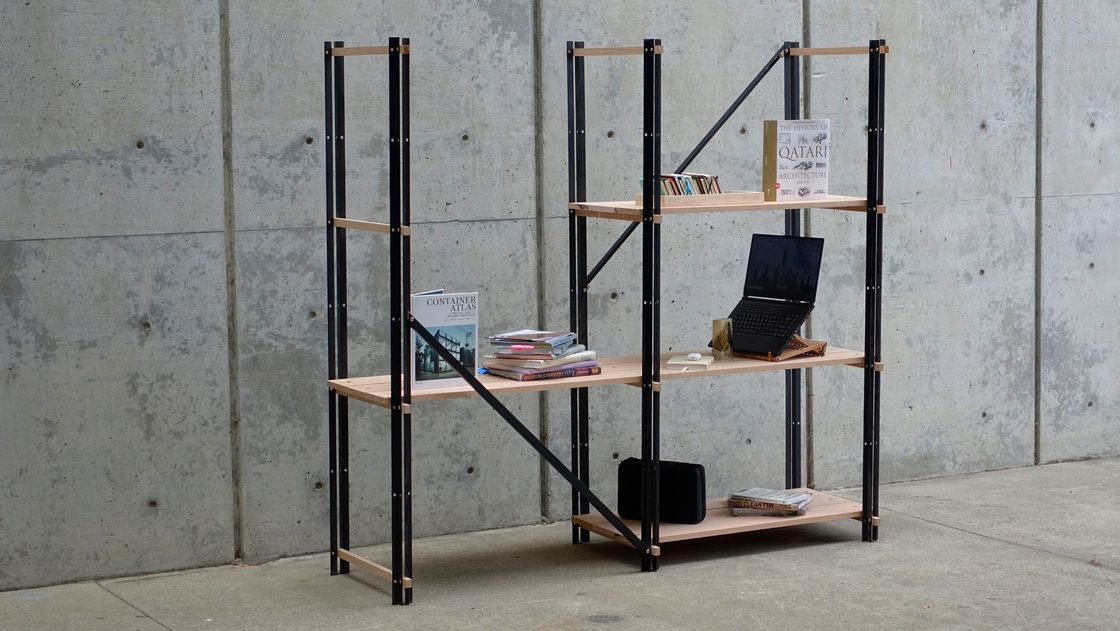
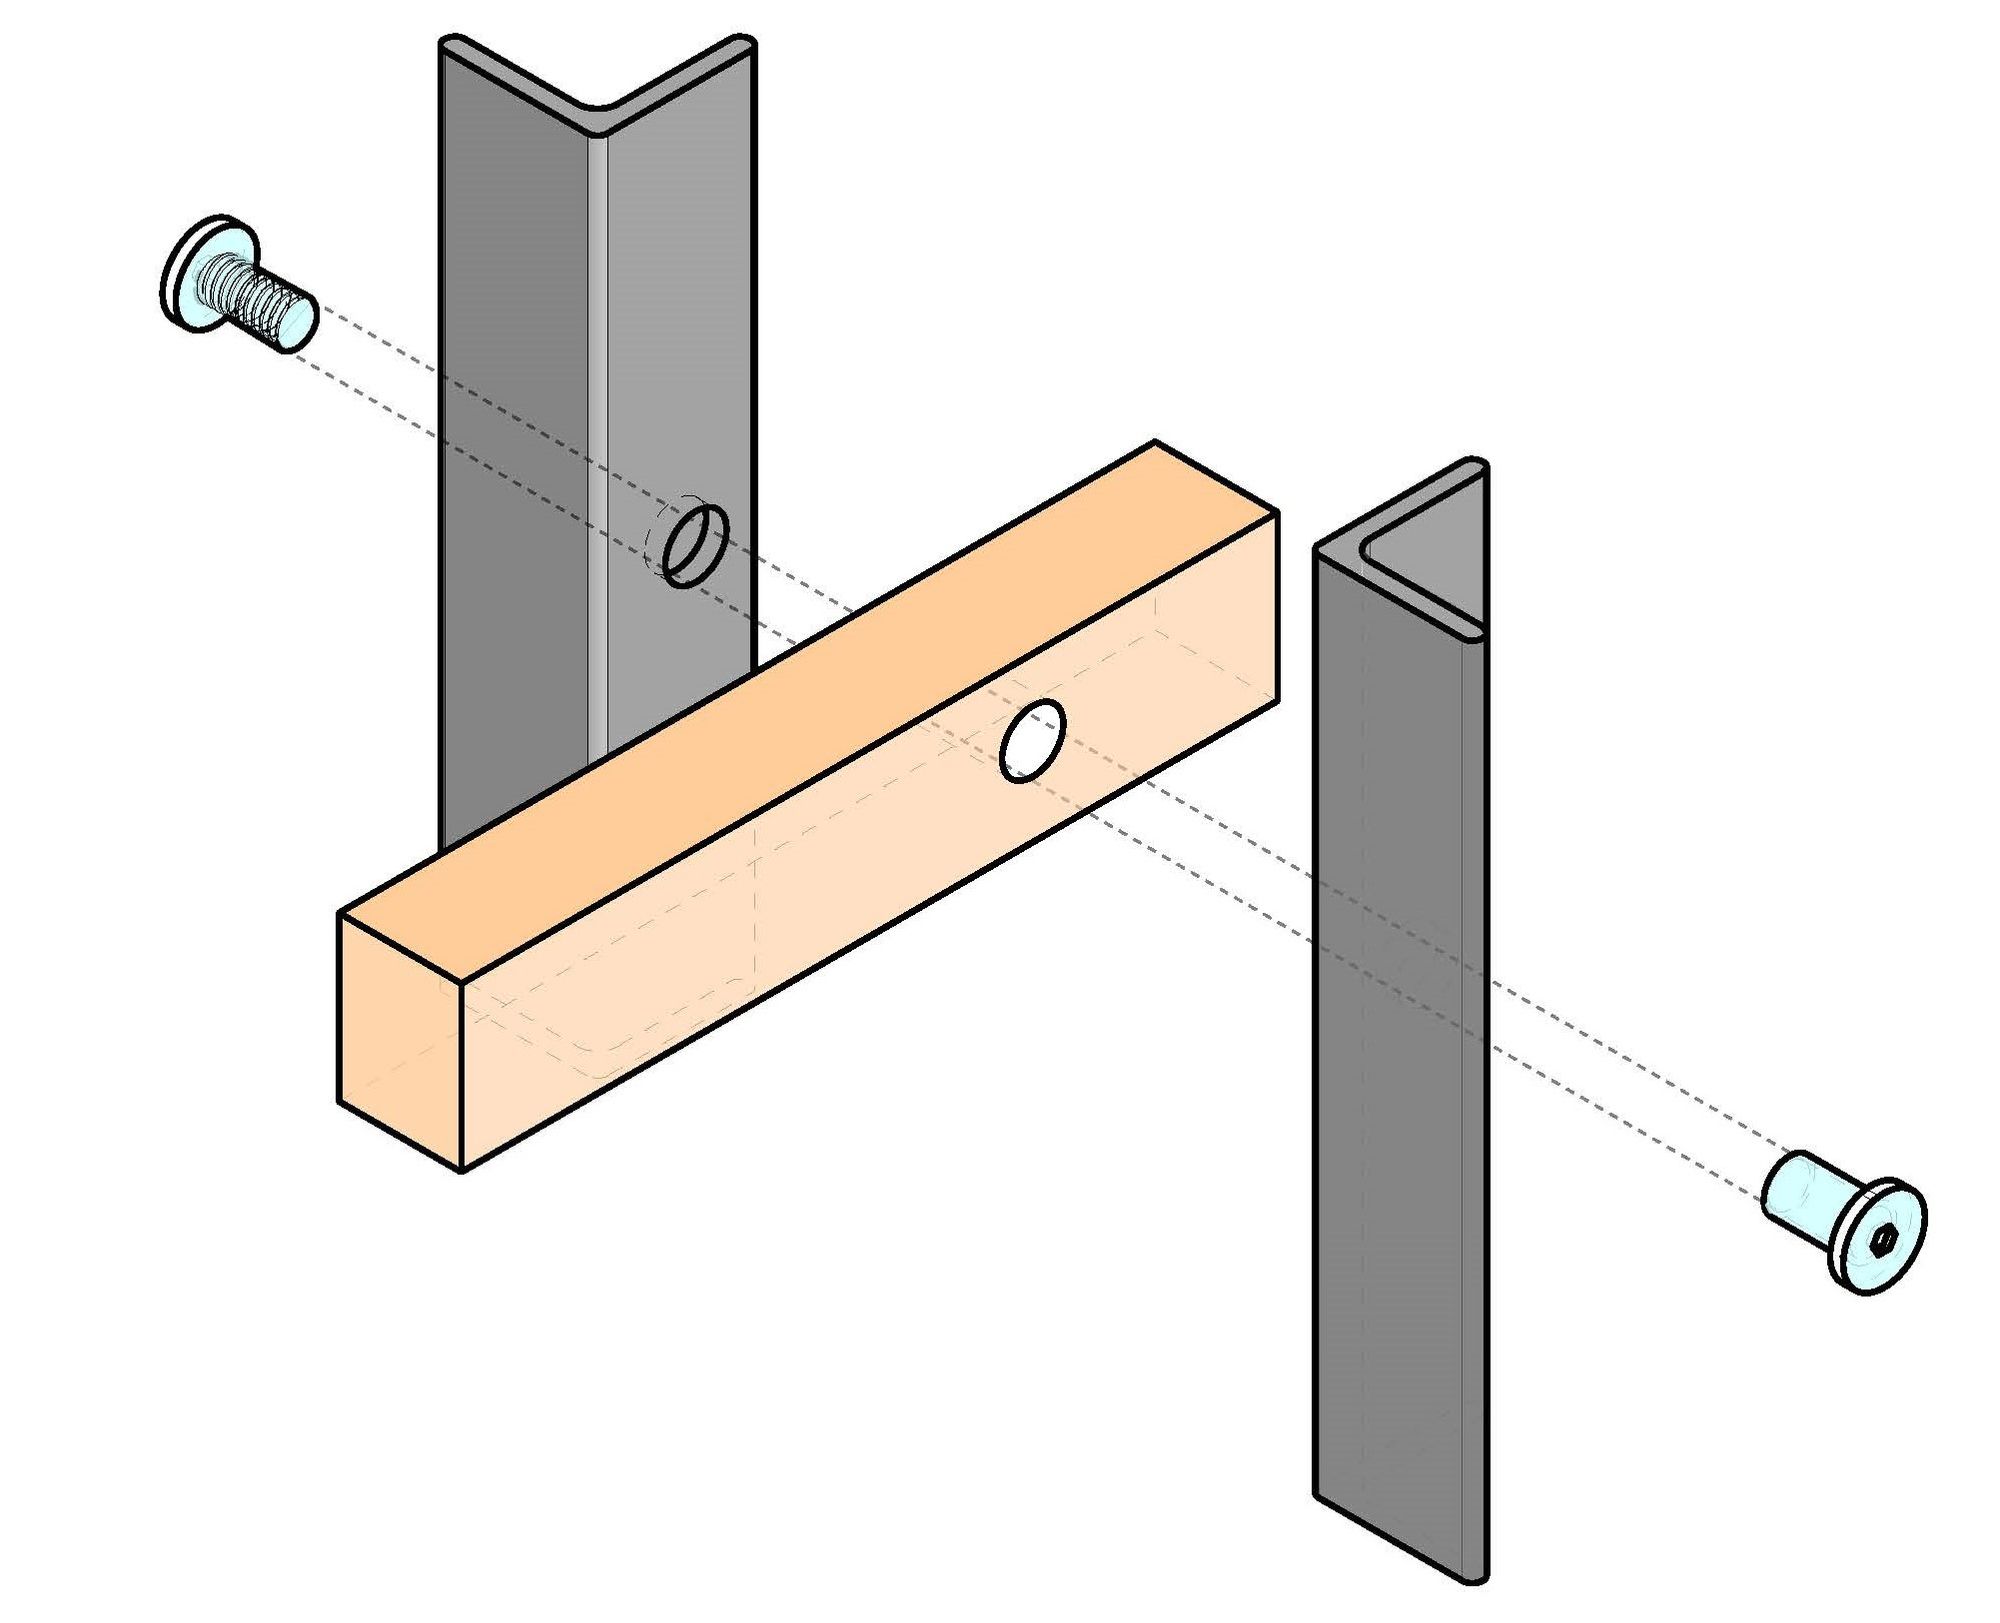
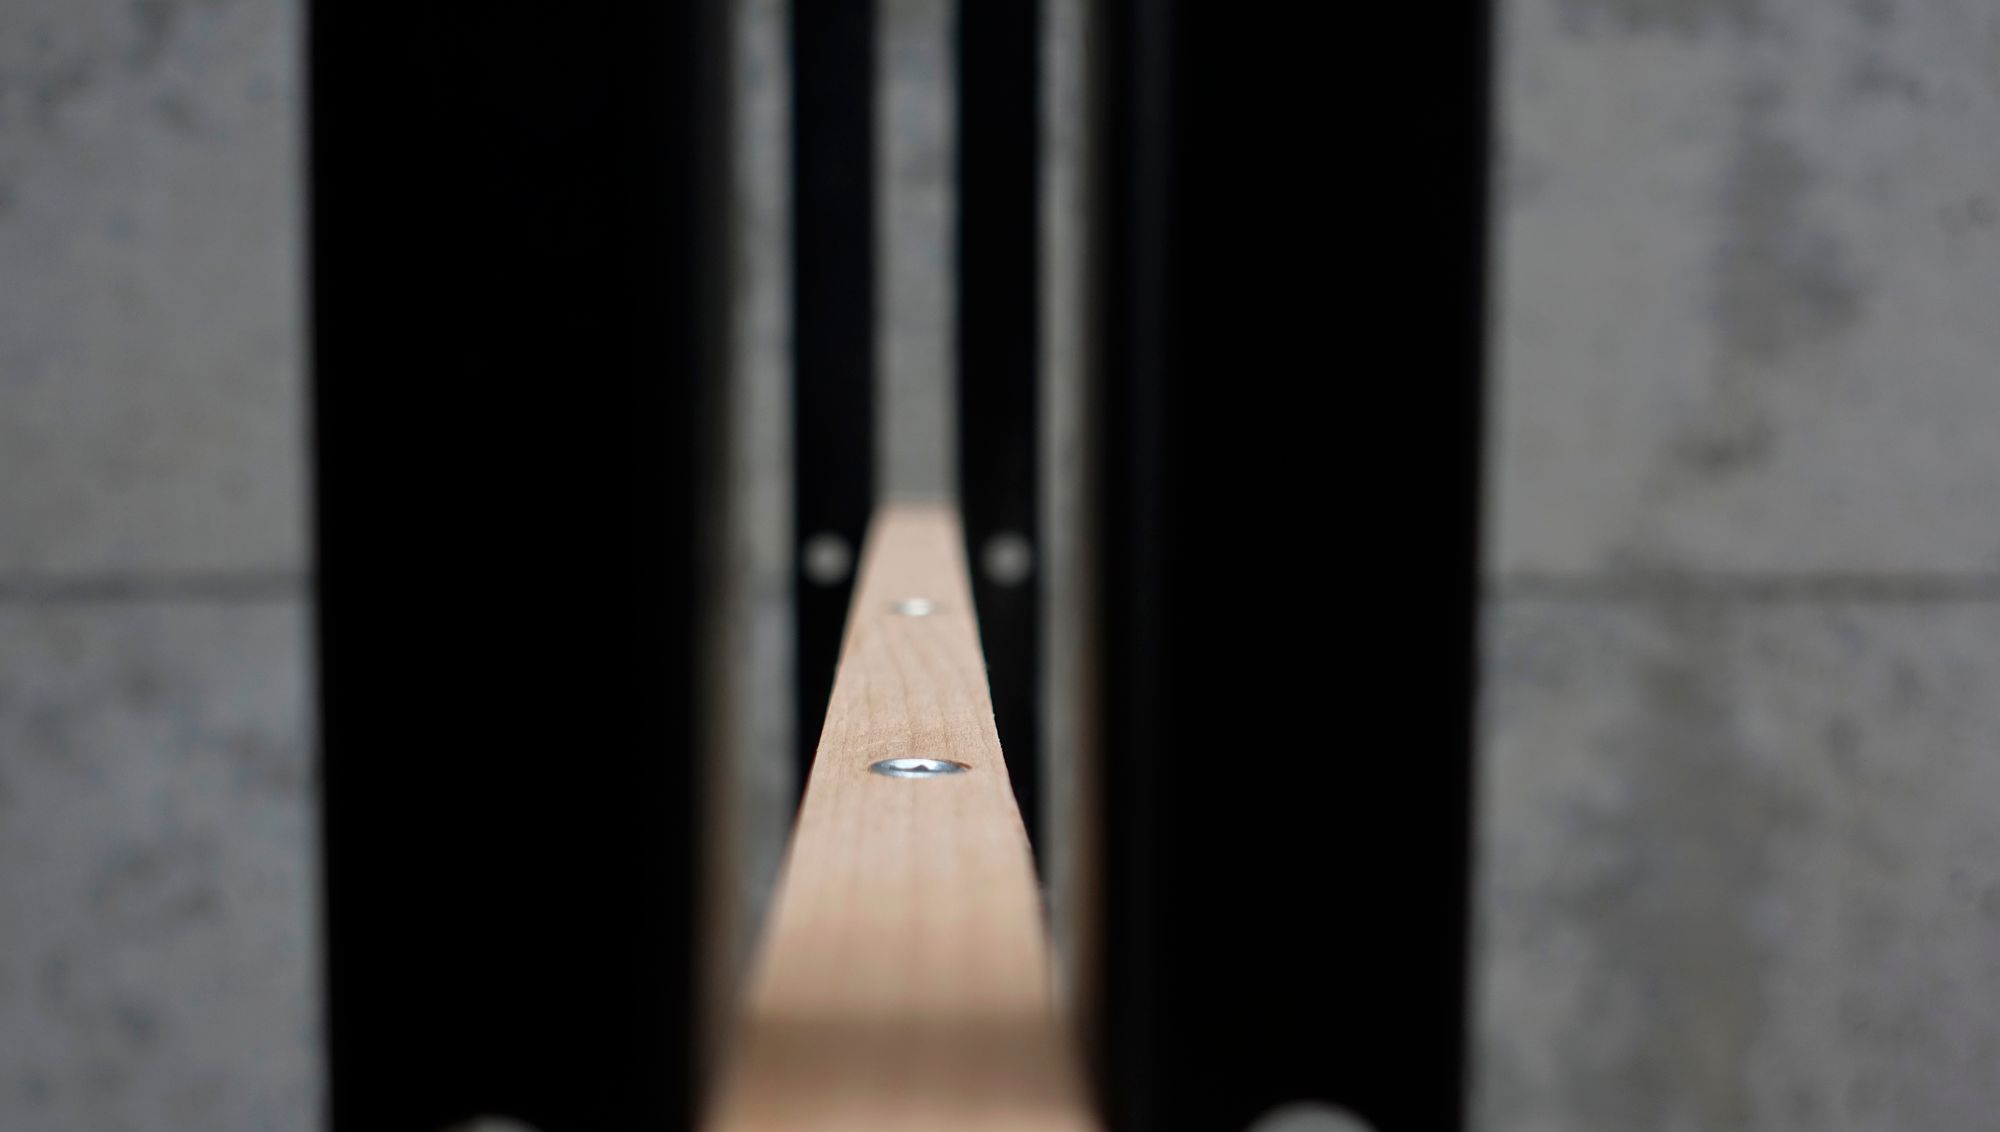
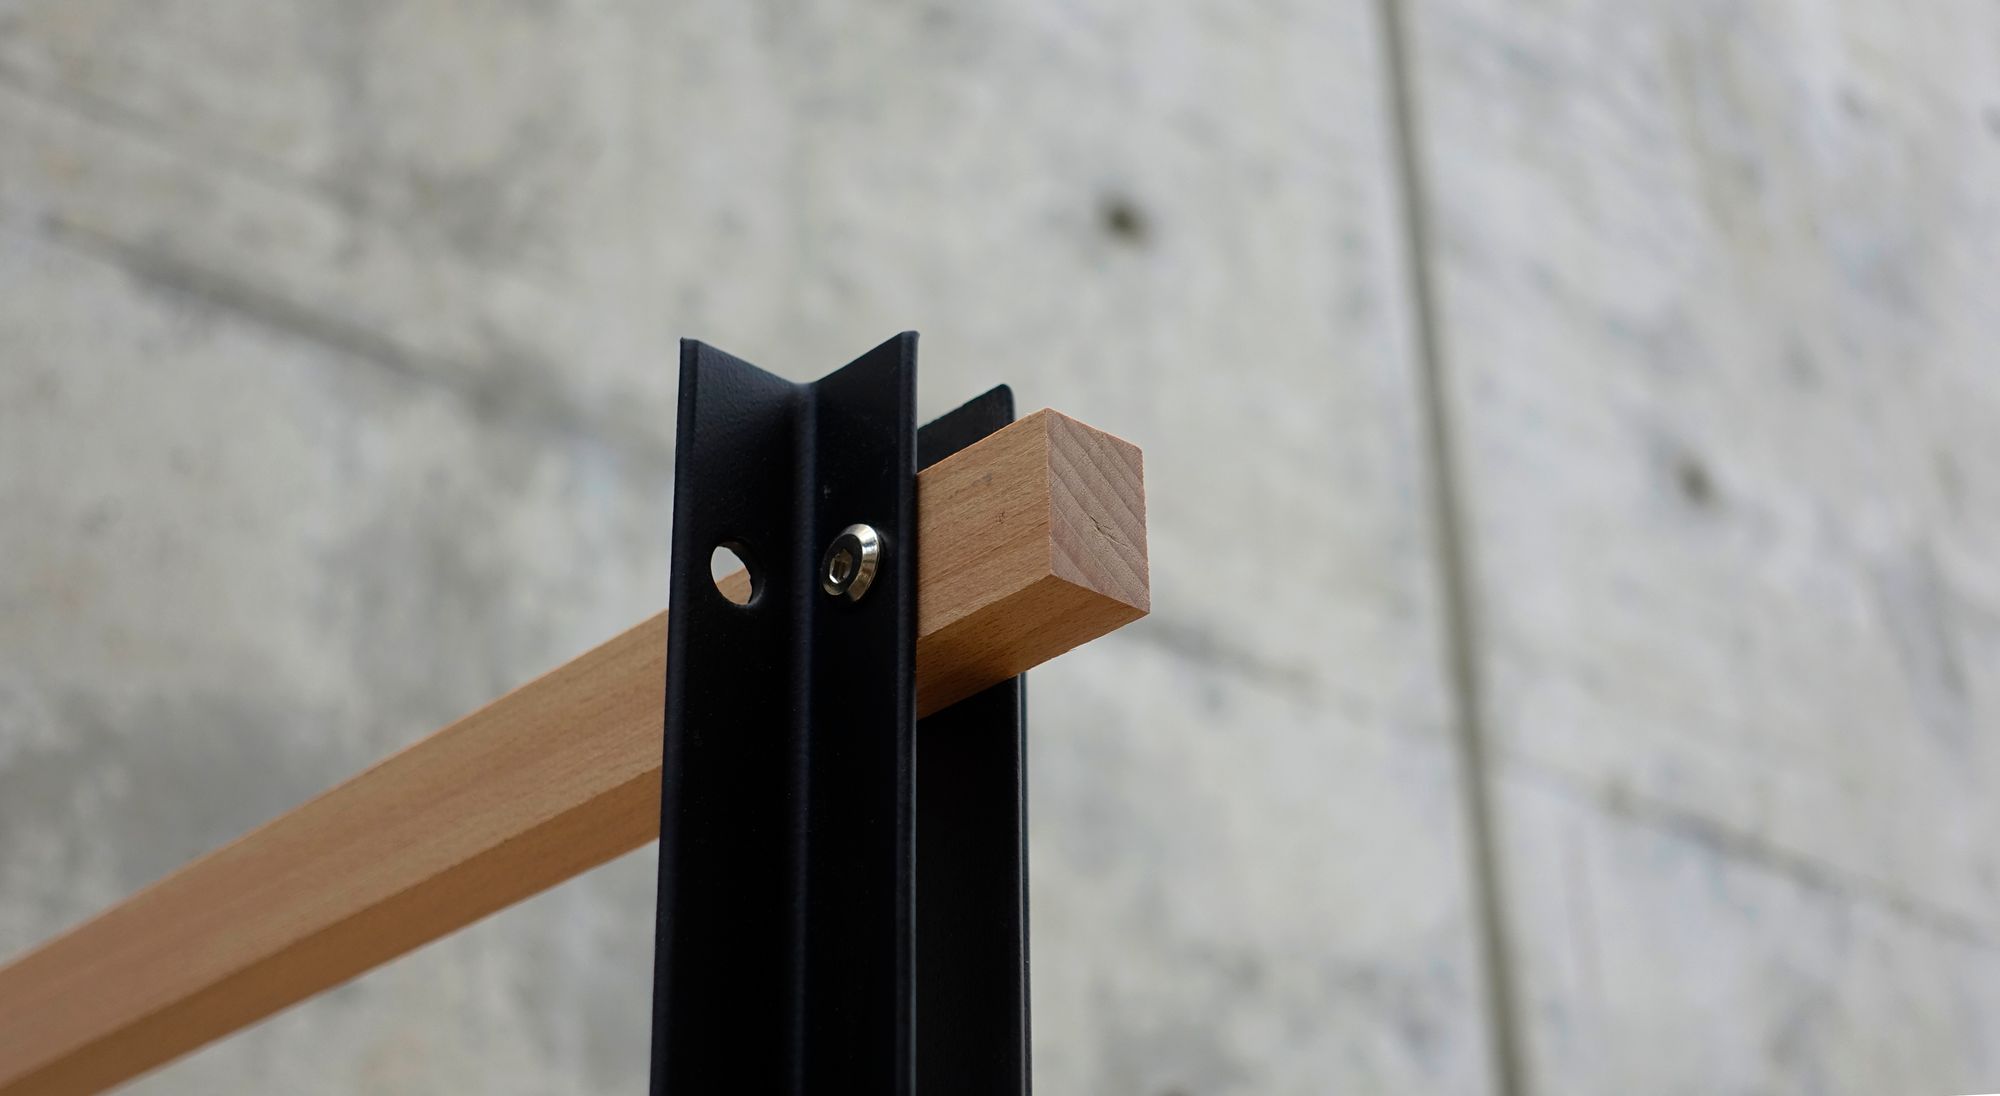
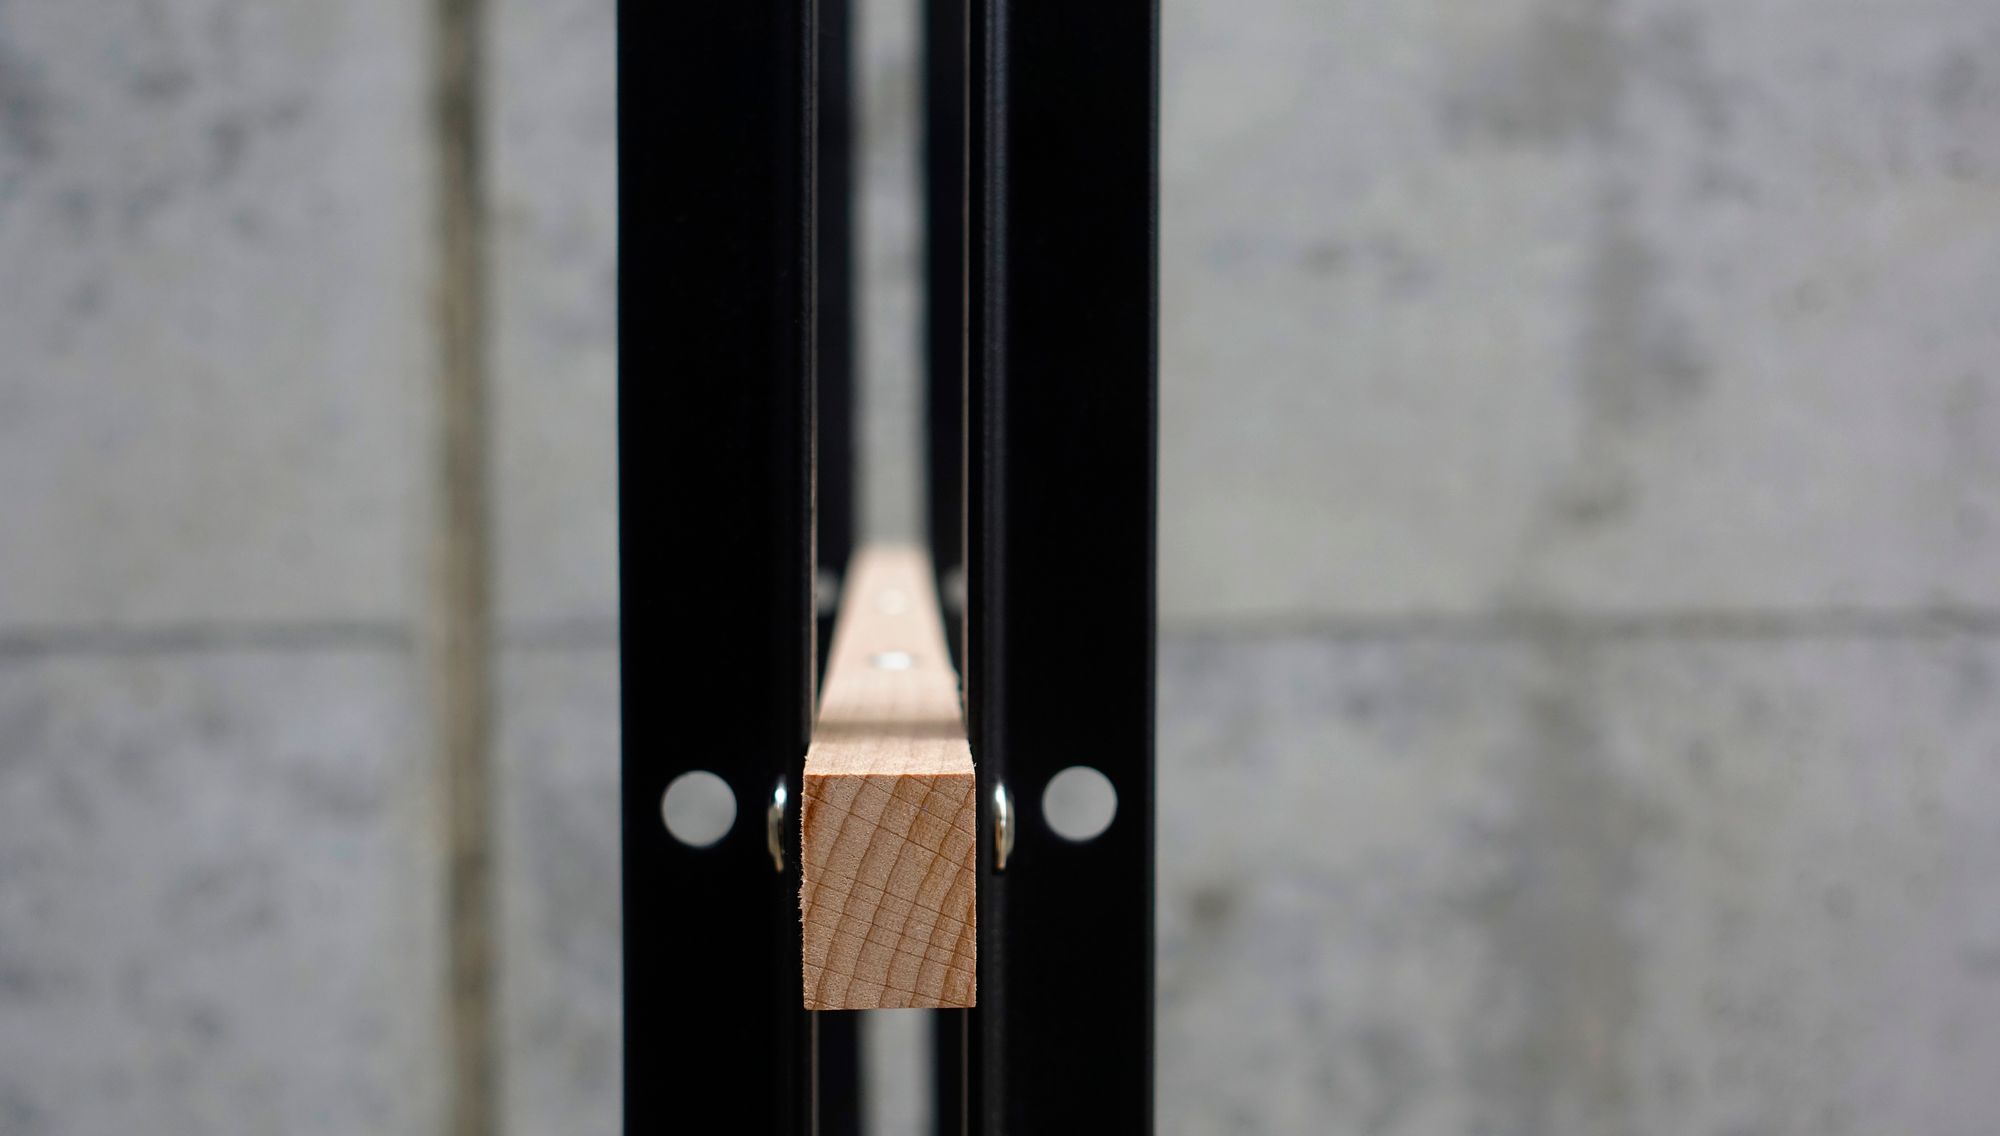
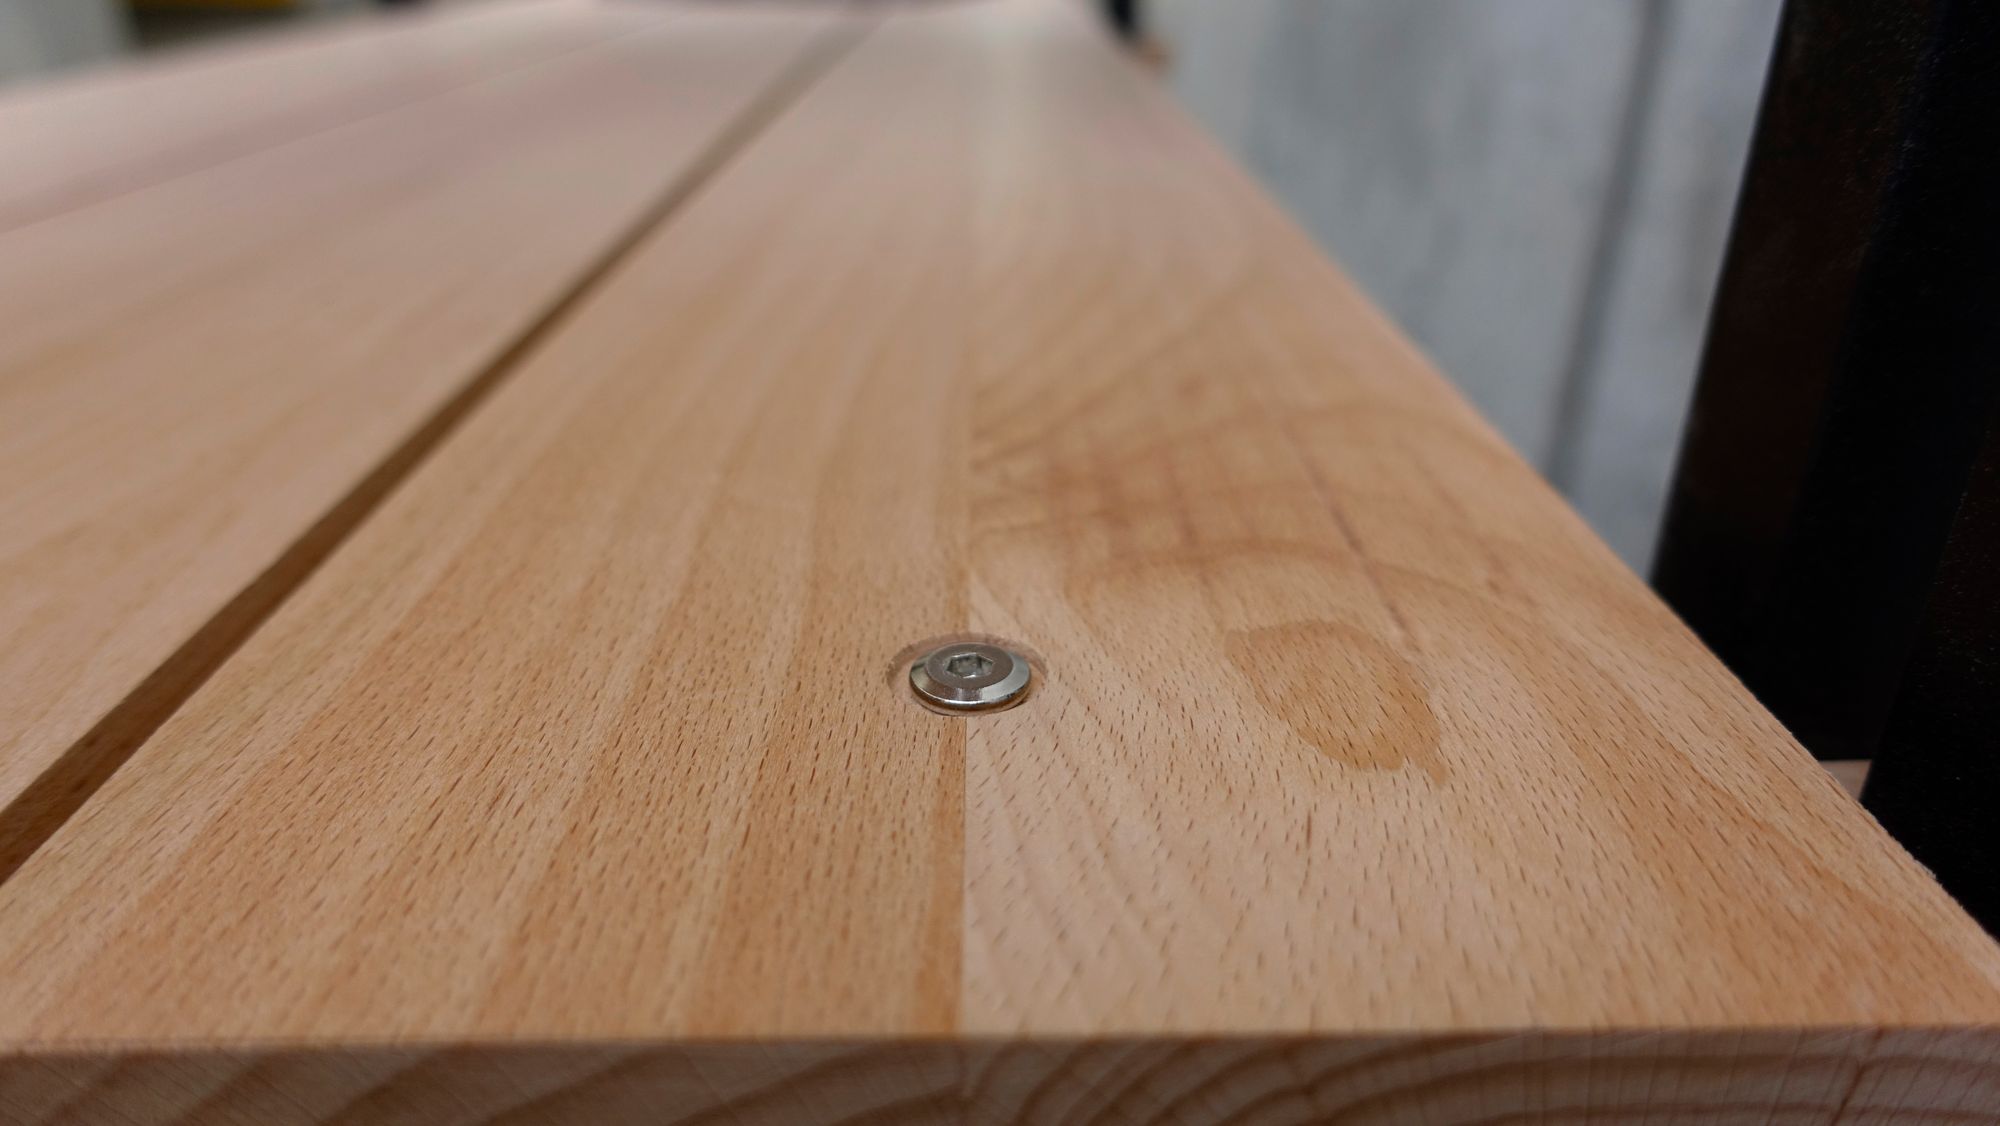
The SÅLLY Detail:
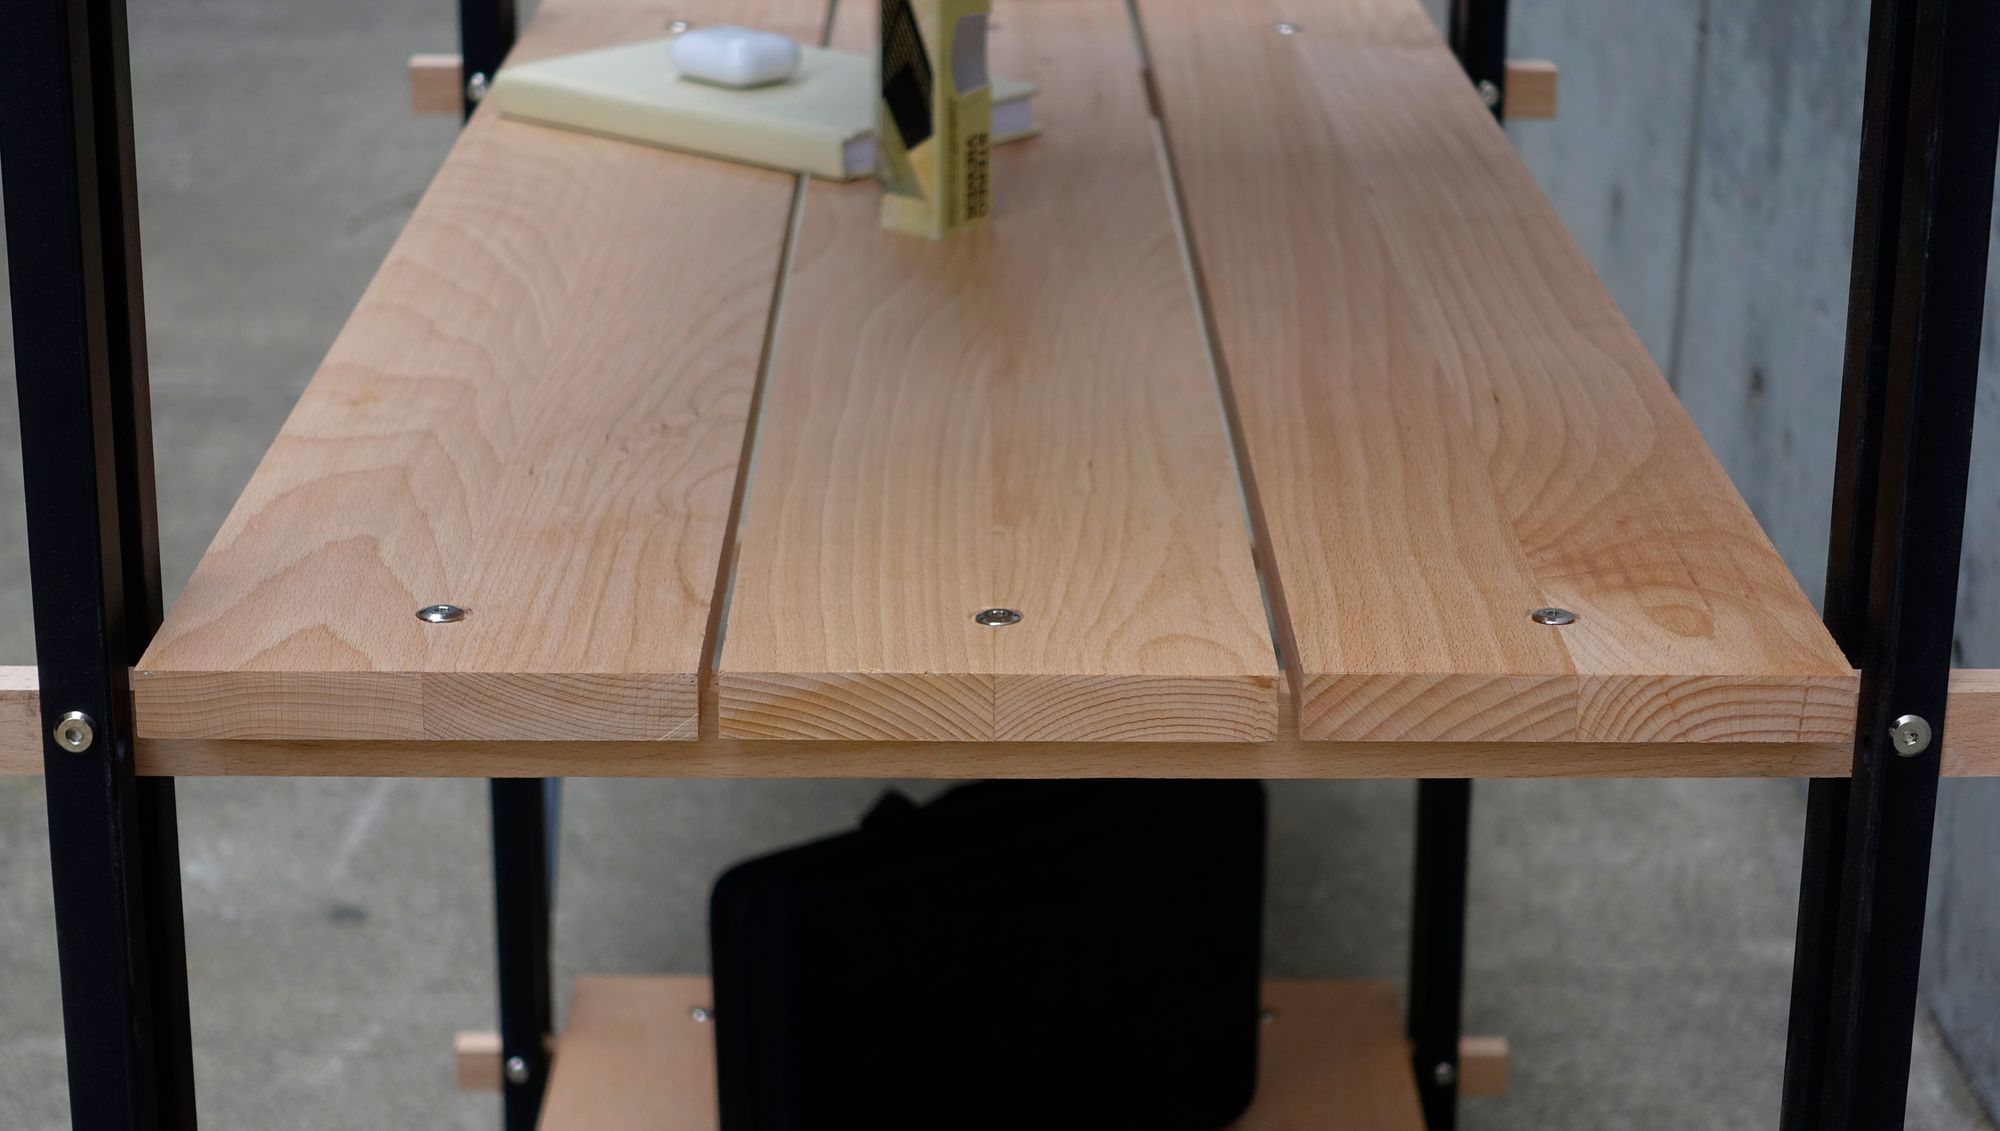
In the case of the SÅLLY Shelving System, it started with a single detail of two pieces of angle iron, wooden spacers, and 1/4"-20 hex head hardware. The limitations, in this case, are 1 person, the tools available at our CAED Shop (College of Architecture and Environmental Design), and the time limit (a few weeks).
The idea here is to start with the materials, machinery, and processes that are available to you. With this shelving system as hard as it is to believe I did not start with shelves in mind. I didn't know what I was going to make as a 'final product'. The shelving just became the most appropriate to use at the furniture show Vellum so others can use it to display their works, and a duplicate was created without shelves to hang lamps on (that story down there).
I'm not sure if I'm getting this across, but this all came out of 1 detail. Because this detail is adaptable enough I was able to create a shelving system and a hanging structure within a week. Because the manufacturing process was already set.
The Process (Jigs):
In the first weeks of the process, after I designed the detail I started to fabricate jigs to streamline the manufacturing process. Setting up the jigs took the most time in terms of the whole process, but that assisted the quick turnaround for the two six-foot by six-foot-high by two-foot wide structures that were fabricated in the timespan of a week.
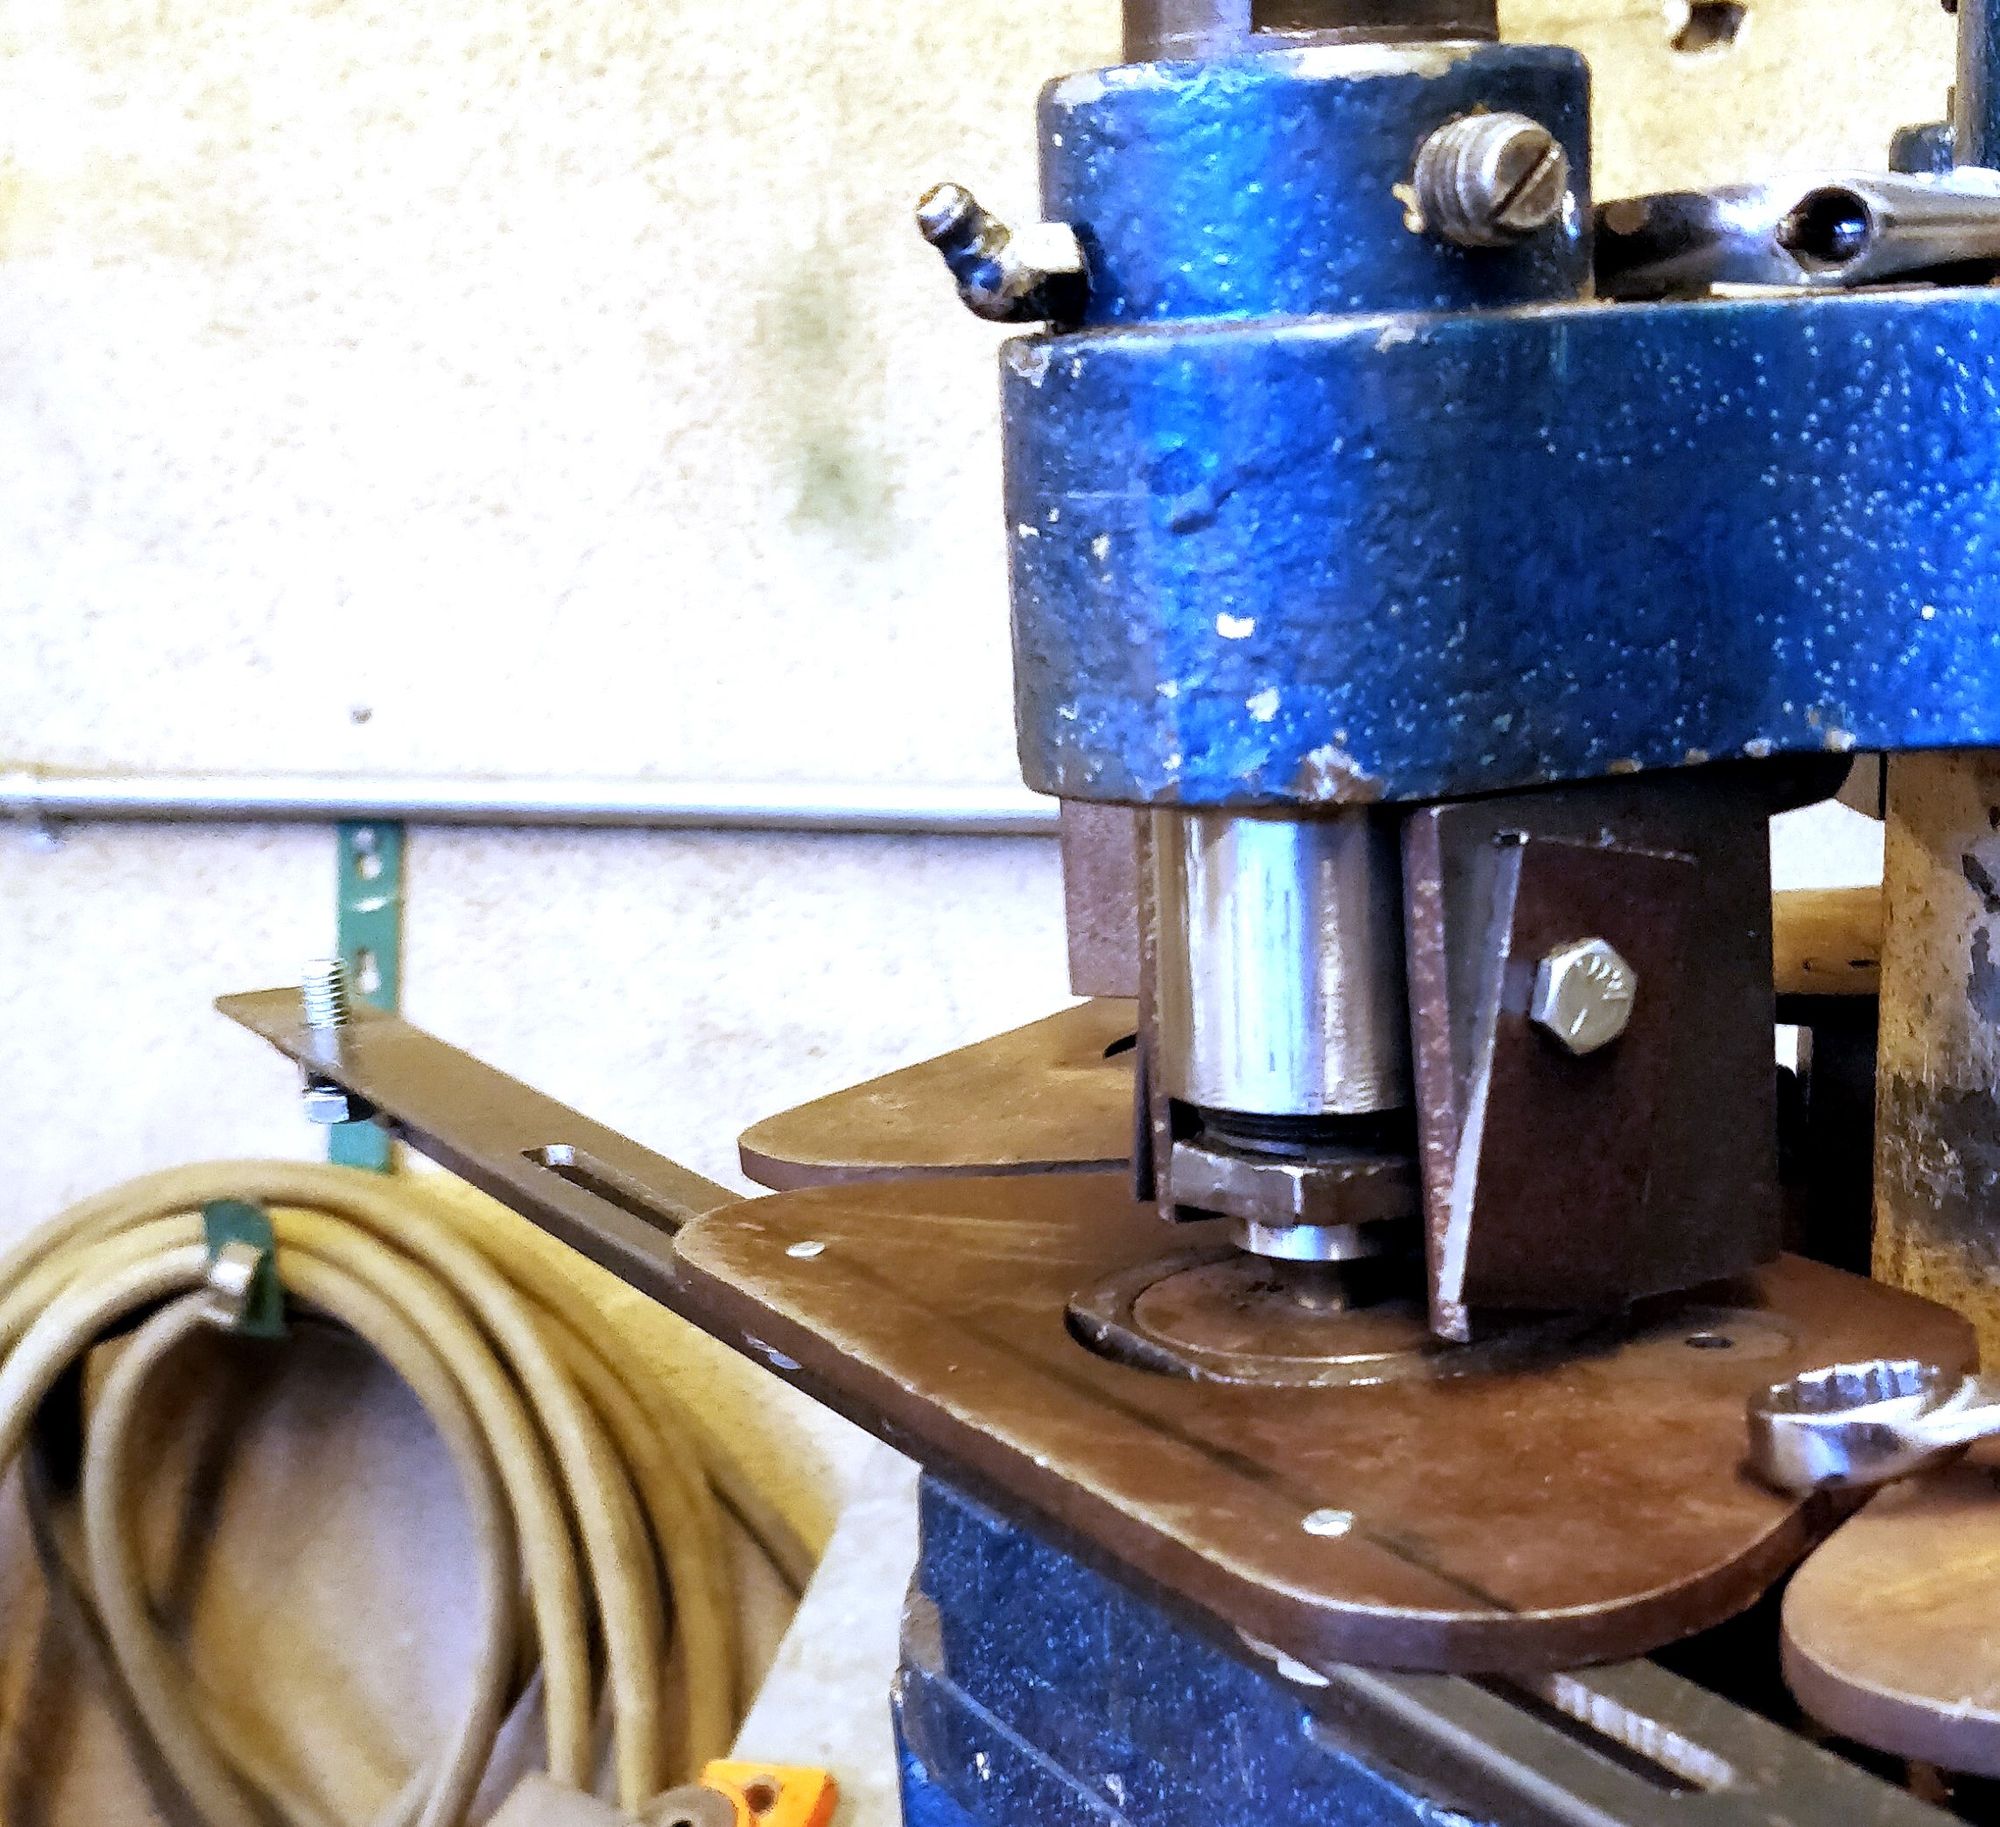
With a jig like the one, I fabricated for the hydraulic punch I was able to punch 168 equidistant holes in the span of an hour. In the span of another few hours, I was able to cut and wire wheel the angle iron, and in the span of another few hours, I was able to powder coat all 12 pieces (for one structure).
The Show:
A week before the annual furniture design competition (Vellum) I was approached by a few students who had pieces they needed to hang. Chandeliers or wall pieces that were not going to be able to be installed in this year's venue. With the system I had already designed I was sure I could create an exact recreation of the shelving system, but this time with stretchers to hang their pieces on. I gave a few of these peers a short training on how to use the jigs and let them get to work while I finished up my shelves.
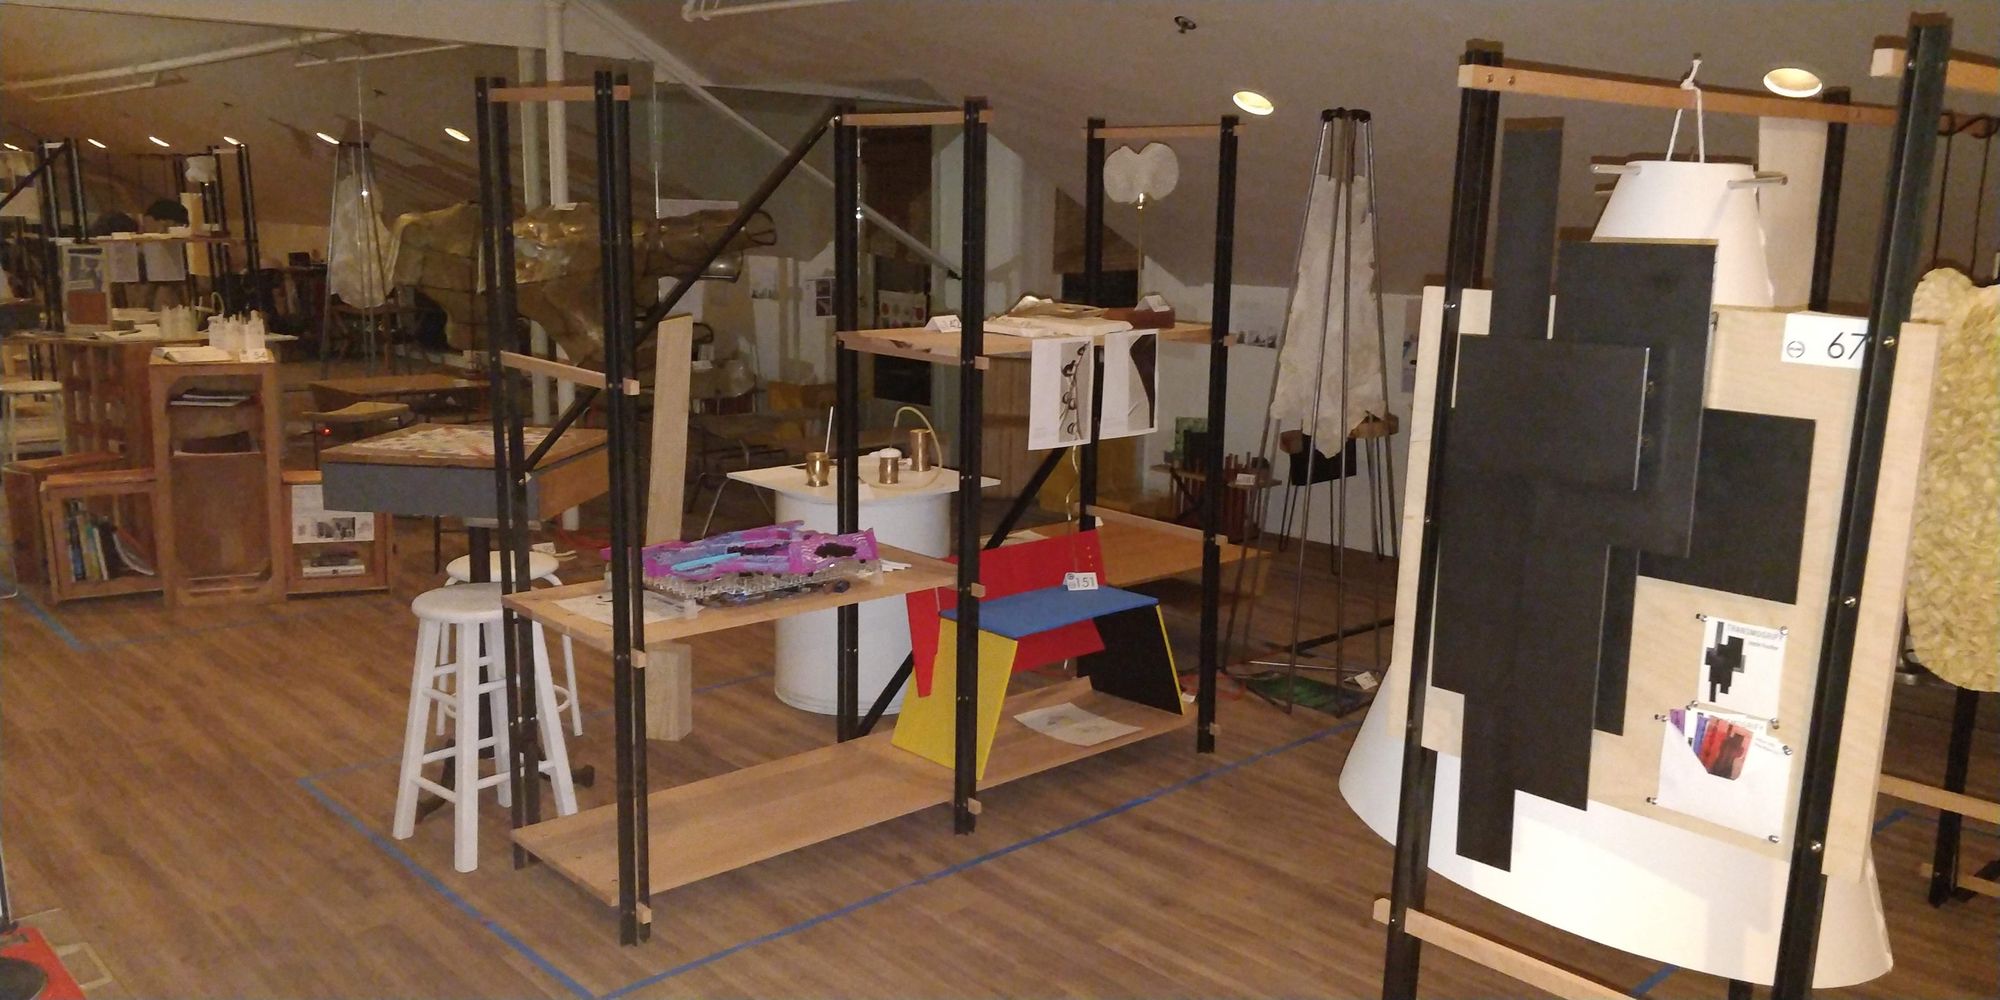
They both were done within the week. I was able to fully train a team of students to manufacture the parts by following the simple process I put in place. I believe two of the projects presented on my structures won some form of award, and that to me is a huge win. The structures seemed like they were so simple and clean that they were actually overlooked as a project, and I took that as a compliment to the level of refinement of the work.
Beauty Shots:
Finally, this project proved to me that an adaptable approach to design and a focus on the detail can be successfully implemented.

Assembly Video:
The whole thing comes together with an allen key so I thought it might be interesting to shoot a little time-lapse of that process (featuring my Cal Poly peers walking by and chatting).